YSQL Loader
YSQL Loader is a data migration tool based on pgloader. You can use YSQL Loader to load data from different sources into YugabyteDB. In addition to the functionality provided by pgloader, YSQL Loader supports dumping DDLs and reading modified DDLs which enables you to use YugabyteDB-specific constructs such as tablets, for example.
This document describes how to migrate MySQL schema and data to YugabyteDB.
Prerequisites
Before starting the migration, ensure that you have the following:
-
Access to the MySQL database that is a subject of migration.
-
ysqlsh command-line connectivity to a running YugabyteDB cluster that is a target of migration.
-
A target database on the YugabyteDB cluster, with the database name matching the name of the MySQL database. You can create the YugabyteDB database as follows:
# Use ysqlsh to connect to any node of the YugabyteDB cluster
ysqlsh --host=<ip>
-- Create the database create database <name>; -
Optionally, a separate migration computer to install and run YSQL Loader. To prepare this computer, perform the following:
-
Install and start Docker as follows:
-
Install Docker. The installation procedure depends on your OS. For more information, see Install Docker Engine.
-
Start Docker by running the following command:
sudo systemctl start docker -
Verify the Docker installation by running the following command:
sudo docker run hello-world
-
-
Verify that the migration computer connects to the MySQL server over port 3306 by using the following command:
telnet <MySQL_ip> 3306 -
Grant the YSQL Loader IP the permissions to access the MySQL database using the following command:
GRANT ALL PRIVILEGES ON *.* TO 'root'@'<pgloader_instance_ip>' WITH GRANT OPTION; flush PRIVILEGES; -
Add a password for the IP and User combination using the following command:
SET PASSWORD FOR 'root'@'<pgloader_instance_ip>' =
    PASSWORD('<password>');
If, after completing the preceding steps, you encounter "Failed to connect" error message, check the access permissions with your MySQL DBA:
-
Verify that YSQL Loader instance can reach the target YugabyteDB cluster and communicate with one of the YugabyteDB nodes across port 5433, as follows:
telnet <YugabyteDB_node_ip> 5433
-
-
YSQL Loader itself, which you can install using Docker, as follows:
docker pull yugabytedb/pgloader:v1.1
docker run --rm --name pgloader yugabytedb/pgloader:v1.1 pgloader --version
Expect output similar to the following:
pgloader version "3.6.3~devel"
compiled with Clozure Common Lisp Version 1.11.5/v1.11.5
(LinuxX8664)
To obtain a list of YSQL Loader command flags, execute the following:
docker pull yugabytedb/pgloader:v1.1
docker run --rm --name pgloader yugabytedb/pgloader:v1.1 pgloader --help
Use YSQL Loader
You can use YSQL Loader to migrate both schema and data from MySQL, or to migrate only schema.
A file containing a Docker command can help you to perform migration.
Migrate schema and data using Docker
You start migration by running Docker. Using Bash, you access the container and run the YSQL Loader command (/usr/local/bin/pgloader). Examples in this section use the Docker image that is based on CentOS 7, so the YSQL Loader command file is stored in the CentOS home directory and the Docker volume is used for mapping the configuration from the /home/centos directory to the Docker container directory. The Docker –rm flag ensures that the container is removed once YSQL Loader completes its tasks.
$ docker run --rm --name <name_for_container> \
         -v <local_dir pgloader_config_dir>:<mount_path_in_container> \
         yugabytedb/pgloader:v1.1 pgloader \
         <mount_path_in_container>/<pgloader_config_file>
The following is a sample YSQL Loader command:
[root@ip-172-161-27-195 centos]# pwd
/home/centos
[root@ip-172-161-27-195 centos]# ls
pgloader.conf
[root@ip-172-161-27-195 centos]# docker run --rm --name pgloader1 -v /home/centos:/tmp yugabytedb/pgloader:v1.1 pgloader -v -L /tmp/pgloader.log /tmp/pgloader.conf
An output similar to the following is produced when YSQL Loader is running:
2021-04-22T18:49:00.000672Z LOG pgloader version "3.6.3~devel"
2021-04-22T18:49:00.264485Z LOG Migrating from #<MYSQL-CONNECTION mysql://root@172.161.20.87:3306/testdb #x302001D3B50D>
2021-04-22T18:49:00.264662Z LOG Migrating into #<PGSQL-CONNECTION
pgsql://yugabyte@172.161.20.43:5433/testdb #x302001D3B3AD>
You can also verify that YSQL Loader is running by executing docker ps:

You can tail the log file specified in the docker command, as follows:
[centos@ip-172-161-27-195 ~]$ tail -f pgloader.log
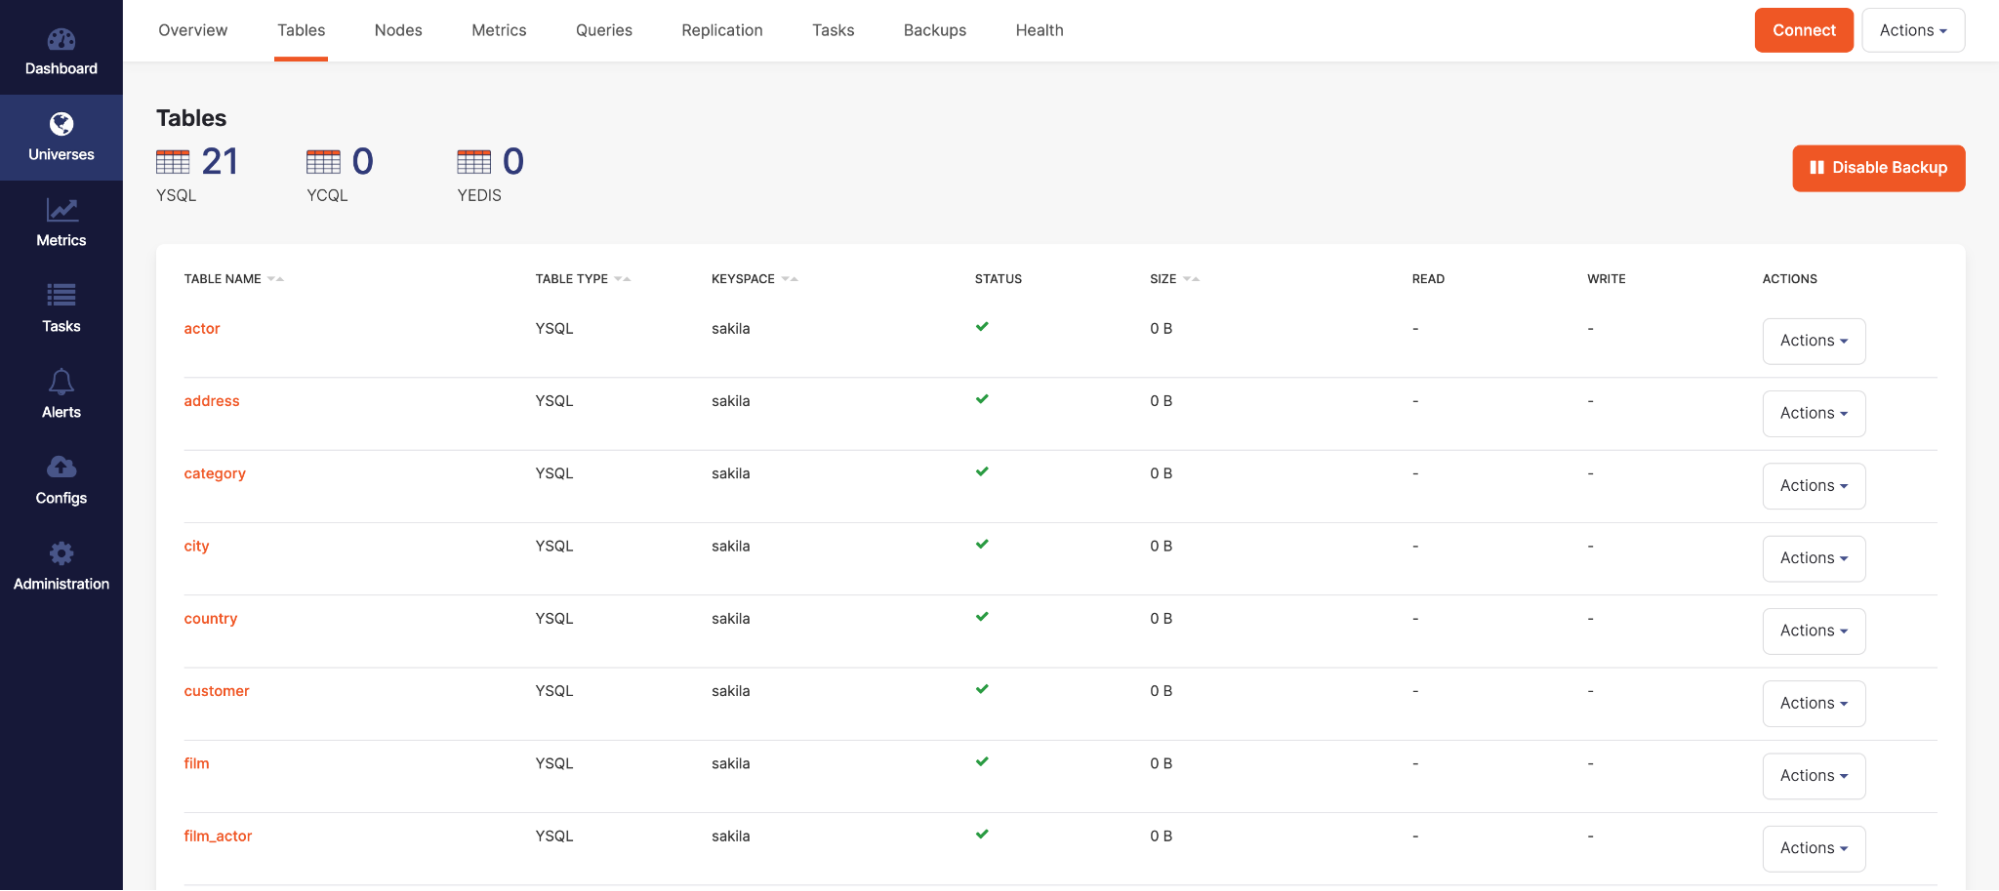
If you have access to YugabyteDB Anywhere, you can check the status of YSQL Loader. To do this, you open YugabyteDB Anywhere and navigate to its Tables section shown in the following illustration to see if the tables have started to load.

In addition, you can check the live queries by navigating to the Queries section shown in the following illustration to see current queries and DDL changes made on the cluster in real time.

Use a YSQL Loader command file
To load both schema and data from MySQL, use a file similar to the following:
load database
  from mysql://root:password@localhost:3306/northwind
  into postgresql://yugabyte:yugabyte@localhost:5433/northwindmysql
WITH
  max parallel create index=1;
You do not have to specify any other options in your command file, as they function exactly as in pgloader.
To migrate only schema, use a file similar to the following:
load database
  from mysql://root:password@localhost:3306/northwind
  into postgresql://yugabyte:yugabyte@localhost:5433/northwindmysql
WITH
  max parallel create index=1, schema only;
Modify the DDL using a command file
You can modify the DDL by performing the following steps:
-
Dump the DDL using a command file, as follows:
load database from mysql://root:password@localhost:3306/northwind into postgresql://yugabyte:yugabyte@localhost:5433/northwindmysql WITH max parallel create index=1, dumpddl only; -
Modify the
ddl.sqlDDL file and run it using the ysqlsh command-line tool. -
Provide the DDL file using a command file similar to the following:
load database
 from mysql://root:password@localhost:3306/northwind
 into postgresql://yugabyte:yugabyte@localhost:5433/northwindmysql
WITH
 max parallel create index=1, data only;
Alternatively, you can execute a command file similar to the following, in which case you do need to run the ddl.sql file using the ysqlsh tool:
load database
  from mysql://root:password@localhost:3306/northwind
  into postgresql://yugabyte:yugabyte@localhost:5433/northwindmysql
WITH
  max parallel create index=1, data only

BEFORE LOAD EXECUTE
  '/Users/myname/quicklisp/local-projects/pgloader/ddl.sql';
Validate the migration
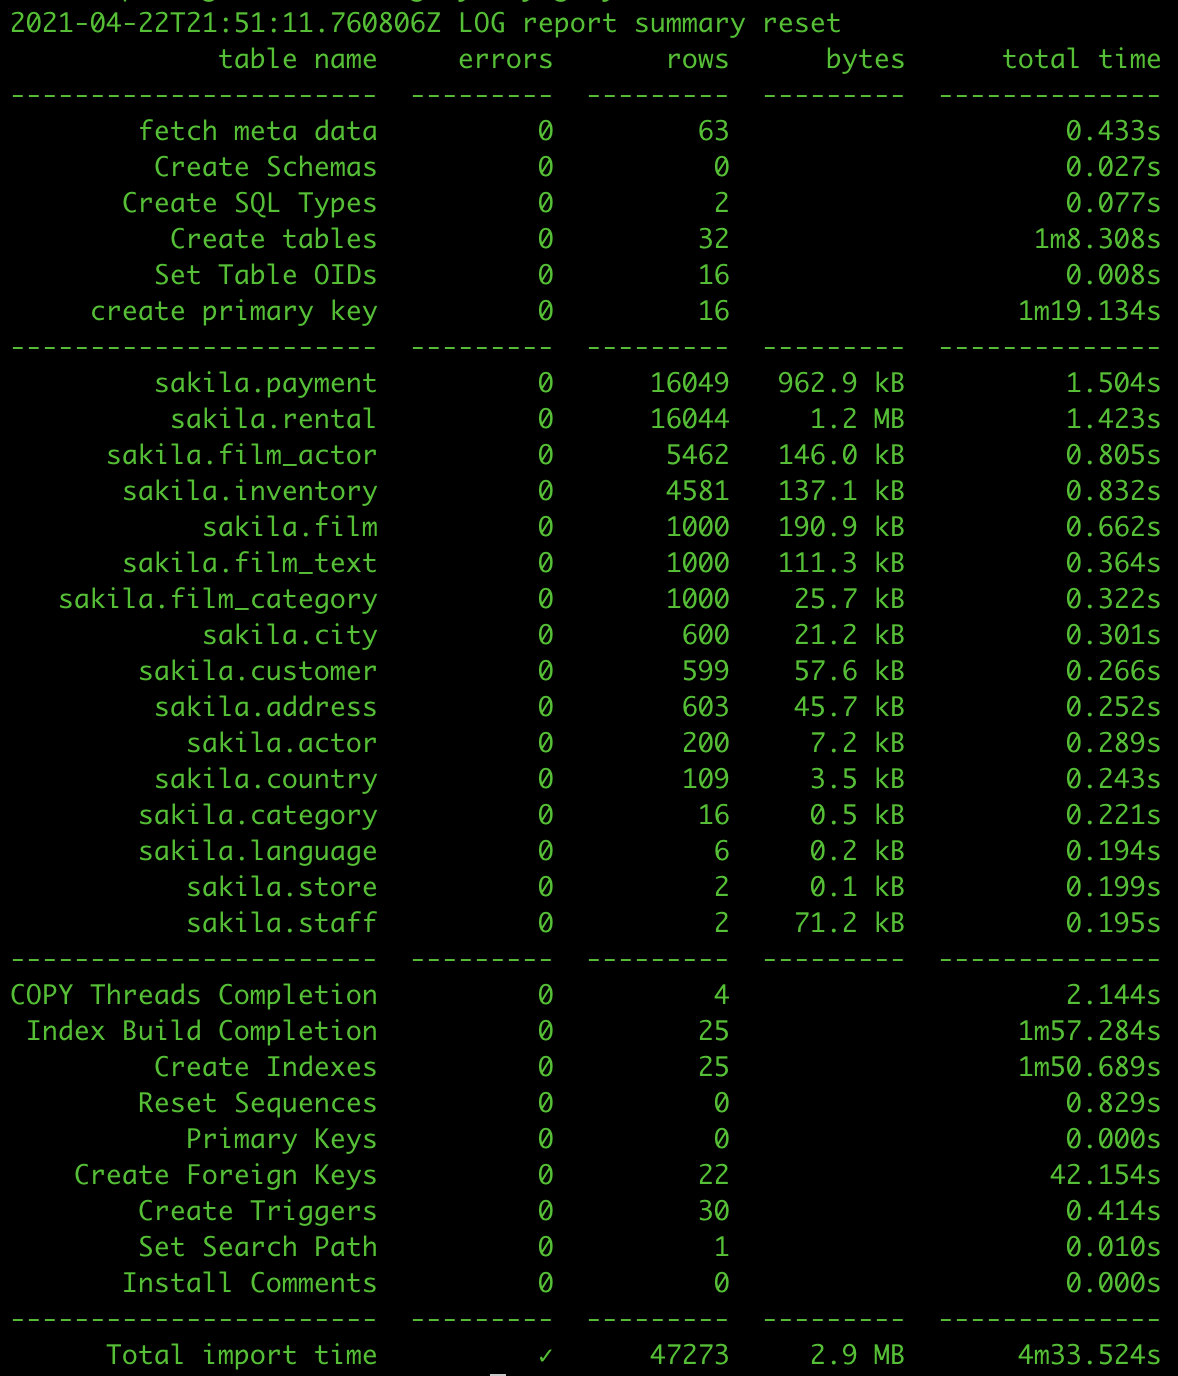
When YSQL Loader finishes the migration, you can see a summary of the migration steps, including the information on how long each step took and the number of rows inserted.

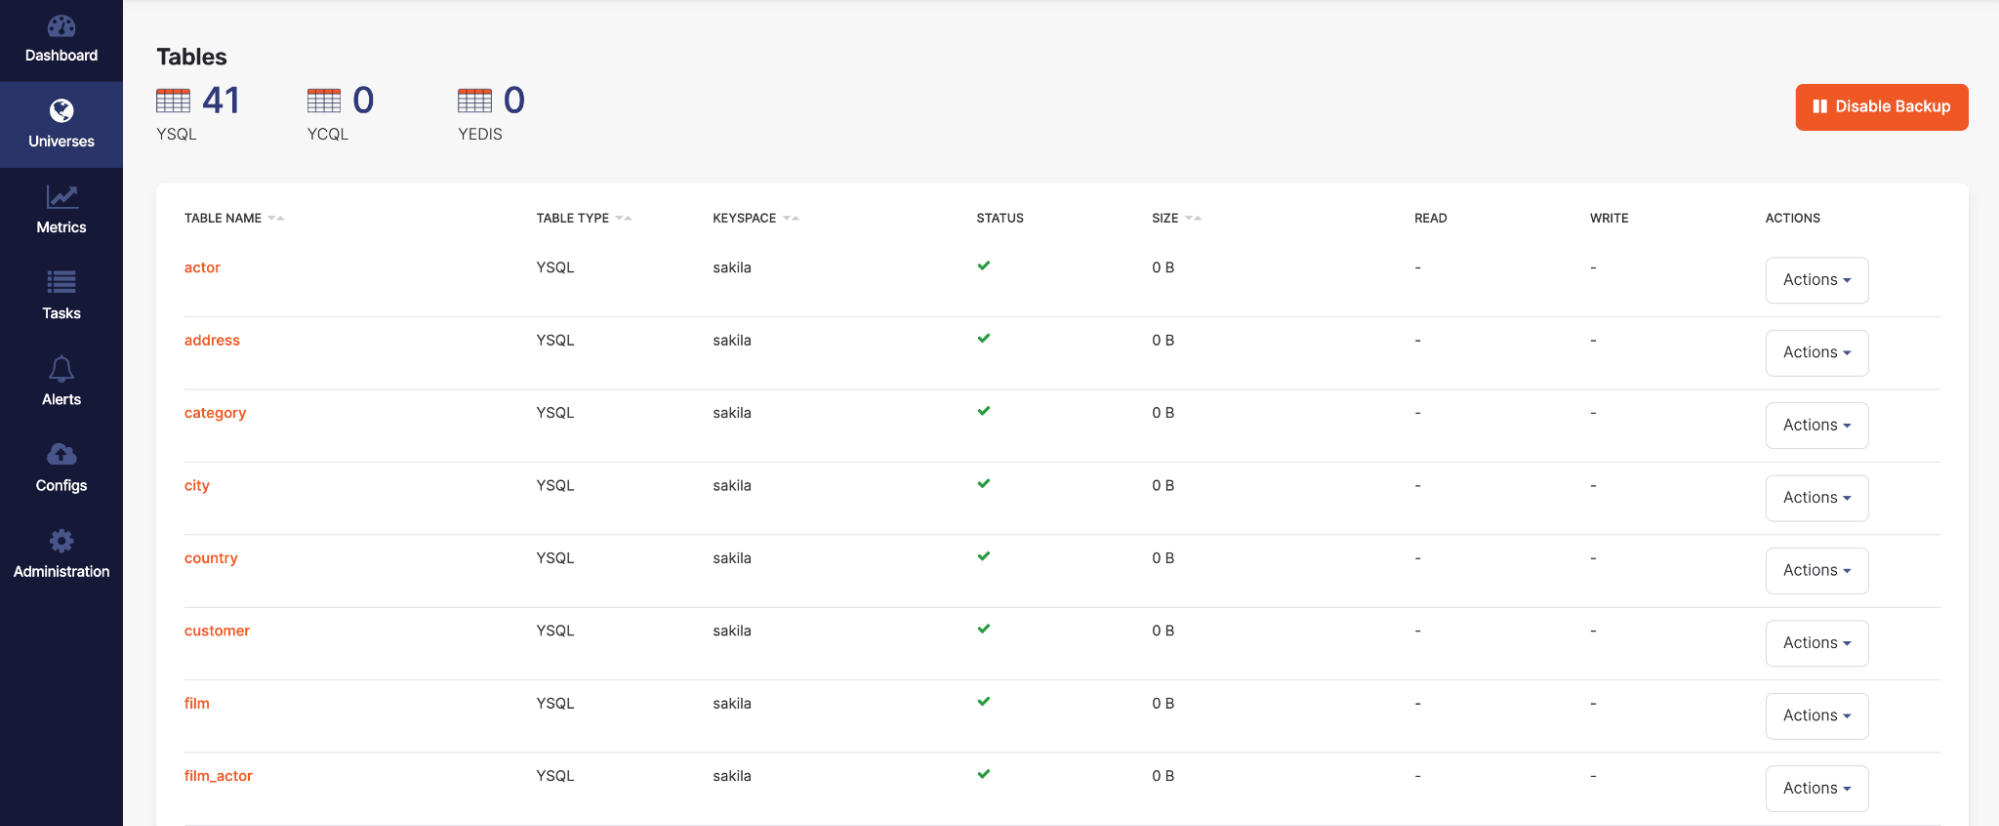
Alternatively, if you have access to YugabyteDB Anywhere, you can check it to see if all tables are present. To do this, you open YugabyteDB Anywhere and navigate to its Tables section shown in the following illustration:

To verify that there are no active migration queries against the cluster, navigate to the Queries > Lie Queries section shown in the following illustration:
